Snorkeling Photography Tips – How To Take Better Underwater Images
Snorkeling photography is easy! You might think this when scrolling through perfect ocean images on social media, but somehow, your underwater photos come out bluish and blurry. No worries, this is how we all started capturing the beauty of the sea. But you don’t need to be a professional photographer or own the most expensive equipment to take clear, sharp images in the sea. Let us teach you how!
We prepared this beginner underwater photography guide for you, which includes tips and tricks we learned over the past ten years and helped us take better images. First, here is a summary of the key points. Below, you find a detailed explanation of each tip.
10 Snorkeling Photography Tips That Will Help You Take Better Photos Underwater:
- Choose a good camera
- Study your camera’s settings
- Shoot in clear water
- Use the natural light well
- Find the best angle by diving down
- Swim close to your subject
- Hold the camera steady
- Learn how to edit your images
- Read about sea creatures
- Practice and educate yourself

Choose the right camera
Having a good, user-friendly camera does half the job in snorkeling photography. Forget about old bulky devices that have more buttons than stars in the sky, and it takes forever to learn the functions. Today’s smart devices offer several features and pre-set modes to help you capture clear photos, even without being a professional photographer.

Finding the right underwater camera may seem difficult at first since the selection is very wide. Depending on your budget and needs, you can choose a compact waterproof, a digital camera with housing, an action camera, or you can use your smartphone.
Compact waterproof camera: the most popular camera choices for snorkeling are compact waterproof models because of their easy usability. Such cameras are sufficient for most average and hobbyist snorkelers.

Digital camera with underwater housing: these setups are recommended for those who want to go professional. Cameras in UW housings can go deeper than standard waterproof models. Also, you can create complete systems by adding accessories like strobes, lights, or flashes so you can shoot high-quality images. On the contrary, such setups are more expensive.

Action camera: using an action camera is a popular choice for traveling because of its small size and compact usability. If you aim for crisp, cinematic videos, get one of the latest GoPros for snorkeling. If you find them too pricey, luckily, several budget GoPro alternatives cost less but can deliver good-quality footage.

Smartphone: smartphone photography has improved significantly in the past years; therefore, it is also an option to take your smartphone underwater and capture some fantastic pictures with it. Just keep in mind that despite the advertisement ‘waterproof’, smartphones need to be in quality underwater housing before being taken into salty water.

Learn to use your camera
You can have the best equipment, but if you don’t know its settings, you won’t be able to take good photos. The latest waterproof compacts are user-friendly and have at least one underwater mode (or underwater white balance available) that automatically adjusts the settings, delivering bright and colorful photos.
Get familiar with the pre-sets, and investigate the settings until changing between modes becomes a reflex so you won’t waste your time in the water trying to figure out how your camera works.
You can achieve good results with manual white balance settings if the underwater mode or UW white balance is unavailable. Find this function, follow the instructions and tell your camera what is white by pointing to something white so it can adjust the other colors accordingly. This works well if the depth and light conditions are relatively constant but needs re-adjustment if the conditions change.
Shoot in clear water
The visibility in natural waters is constantly changing; this is one of the most important factors that affects snorkeling photography.
The water clarity is better when fewer particles are in the water. If too many particles are around, the water gets murky, resulting in blurry images full of tiny white spots. It will seem like you are shooting in snowfall because the light reflects on all small particles. Various reasons can affect water clarity, including unnatural ones such as pollution or natural ones like coral spawning, currents, or tides.
Of course, you can’t control nature, but if you learn about currents and tides, you will enjoy the advantages of choosing the right time for snorkeling and for your underwater photography session. For example, a falling tide pulls back the water and sand, causing murky water. While the incoming tide brings fresh water and creates excellent water clarity.
Use the natural light
Water is denser than air and, therefore, absorbs light differently. Blue wavelengths travel the longest, while red is the shortest in the water. This is the reason why the colors disappear from underwater photos.
To achieve colorful images, underwater photographers use strobes, but they are pricey and difficult to carry. But if you do snorkeling photography, you can take wonderful images using natural light because you stay near the surface. You need to learn how to position yourself and your camera to get bright and sharp images.

Choose a sunny day to practice; this is when you have the best chance to take bright, clear images. Position yourself so that the sun is at your back, lighting up the scene you wish to capture. Don’t turn the lens directly towards the sun (unless you intend to capture the sunrays, a silhouette of a coral reef or sea creatures).
Find the right angle
A simple yet one of the most important snorkeling photography tips is finding the right angle. Most snorkelers take photos while floating on the surface only. But coral reefs are 3D structures and so are the sea creatures, therefore taking photos when pointing down your camera from the surface won’t give you the result you will be satisfied with. To take better photos, you need to dive down.

I know that snorkeling means floating on the surface, but believe me, you can see the underwater world from a different angle if you swim 6-10 ft/2-3 m deep, making your snorkeling photography much better.
To do this, you need to learn how to skin dive, including the duck diving technique and holding your breath. This, of course, needs practice, and the best is if you ask for help from professionals at the beginning who can teach you how to do it safely.
Get close to your subject
Due to the above-mentioned high density, water decreases contrast and sharpness and causes color loss. The bigger the distance between your lens and your subject, the less color you will get in the photos. Therefore, zooming is not a good idea because the distance will remain the same.
Instead, you need to get as close to your subject as possible without disturbing the sea creatures, damaging corals and hurting yourself. It is an essential snorkeling photography skill you need to learn to improve your images.

The best way of getting close to marine animals consists of various skills such as diving down (like mentioned above in the ‘find the right angle’ section) and moving slowly. Learn how to use your fins without making too much noise so you won’t frighten the fish and creatures away.
Hold your camera steady
You might know how crucial it is in photography to hold your camera as stable as possible to get sharp and clear images. This is one of the biggest challenges in snorkeling photography.
Divers are less likely to suffer from this problem because they can control their buoyancy by inflating/deflating their dive jacket, moreover they use weights to stay more stable, but snorkelers don’t have these benefits. Also, there is more movement in the upper layers of the ocean, which makes holding a camera steady even more difficult while snorkeling.
Luckily, we have some good snorkeling photography tips for this problem:
- Hold the camera close to your body.
- Learn to feel the ocean and shoot when there is less movement in the water, no big wave is coming.
- Use your flippers to stay in balance.
- Get an underwater camera tray to increase stability.

Aluminium camera stabilizer tray
- lightweight yet durable aluminum handheld camera tray
- universal screw mount
- anti slip handles
Use a post-processing software
You are wrong if you think that the professional underwater photos you can see on the internet or in magazines came out that perfect. A good camera and knowing how to use it are essential, but post-processing is almost always necessary in underwater photography.

There are many programs available, from basic ones to professionals. Install one on your computer (some are also available as smartphone applications) and start editing your images. Classical software like Adobe Lightroom or Photoshop are the best choices; they offer limitless options for picture manipulation. Of course, you don’t have to know all the functions to improve the photos. Even basic, easy changes will do magic; here are some to start with:
Basic underwater photo editing tips
Here are some easy editing tips you can apply to your images to make them vibrant and colorful. These basic options can be found in all post-processing software (just maybe under different menus and with slightly different names.
Each photo is different, so no general setting can be applied to all images. Play around with the settings until you get a result you like. In the end, this is the most important, isn’t it?!
- Brightness: is your photo too light or too dark? You can easily change this using the brightness (or exposure) function.
- Contrast: shooting in water reduces contrast, so you need to increase it to make the image look lively and highlight the details. Be careful and don’t put too much contrast because the picture will become dark.
- Color balance: color balance or color corrector can increase/decrease the amount of colors in the image. This is a magic function that is super effective if it comes to editing snorkeling photos. Add more red to restore natural colors, and reduce green if you were shooting in green water.
- Color temperature: setting the colors warmer (adding more yellow and red) or colder (adding more blue) will change the whole appearance of the image. The perfect temperature depends on the topic of the photo and, of course, on your liking.
- Saturation: saturation means how strong the colors in the image are. If you think the photo looks faded, increase the saturation so the colors become lively. Don’t add too much because the image can get easily over-saturated, which is not natural.
- Sharpness: changing the sharpness makes the photo detailed. Increase it until the picture becomes clear, but not too much, because it also brings up imperfections and makes the image noisy.
Tip: if your camera can shoot in RAW, select this option because these files can be edited without data and quality loss.
Study marine biology
You don’t need to become a marine biologist, but knowing the creatures you wish to photograph helps capture the most fascinating moments. Get a reef fish identification guide! It will help you identify the different species and know more about their behavior and habits.
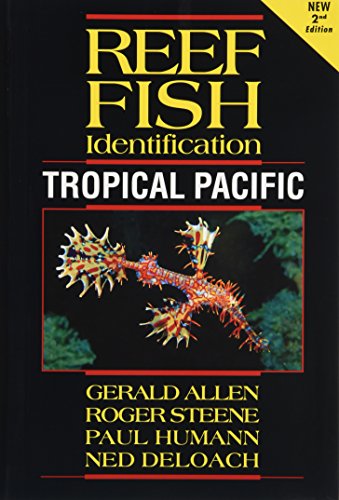
Reef fish Identification book
- comprehensive reef fish guide
- detailed information about 2000 species from Tahiti to Thailand
- more than 2500 high-quality photos
Marine ecosystems are so complex, where all creatures have their roles, so I encourage you to spend time just observing this wonderful world and you will recognize that the creatures follow behavior patterns. On the other side, learning about marine life is critical to know what species are poisonous, can bite or have toxic stings so you will know from which you have to stay away.
Practice and learn from professionals
Practice makes the master! We couldn’t agree more on this if it comes to underwater photography! We can give you hundreds of snorkeling photography tips, but just reading them is not enough.
Whenever you have free time, study your equipment. Go to the beach on the weekends. Even if there is no coral reef where you live, take photos just for practice. Attend workshops where pros share their knowledge and experience!
When going on a snorkeling vacation, stay in a hotel or apartment with a nice house reef. Like this, you can be in the water as long as you want which you can’t do if you need to take a crowded boat every day to get to a snorkel spot.
The more photos you take, the more you know about your camera, and the more you know about the ocean and marine life, the better you will get at underwater photography. Last but not least, don’t be shy about asking for advice from professionals or signing up for an underwater photography course if you really want to improve your skills!
Inspired? Pin it!